Connecting the ADXL345 accelerometer to the Raspberry Pi 3
- Posted on July 05, 2016
- engineering
- By Carlos Camacho
Since a few months I’m kind of interested in research topics related to displacement calculation based on time series acceleration. This basically shows that when something starts moving it displacement depends on the velocity and the time that it has been moving, but due to the fact that the velocity changes continuously we take this variation as the object acceleration (meters per second per second). In this case we will use the accelerometer to estimate the relative position to a point p, which is derived using the double integration of the acceleration metrics.
Until now we have no speed, time or acceleration metrics so we are going to start from the very beginning.
The items needed for this project are; Solder, Solder support, Solder wire, Flux, Jumpers kit, Raspberry Pi 3, Raspberry Pi 3 case, GPIO board and the ADXL345 sensor.
Total budged for this project: 105.73 Eur.
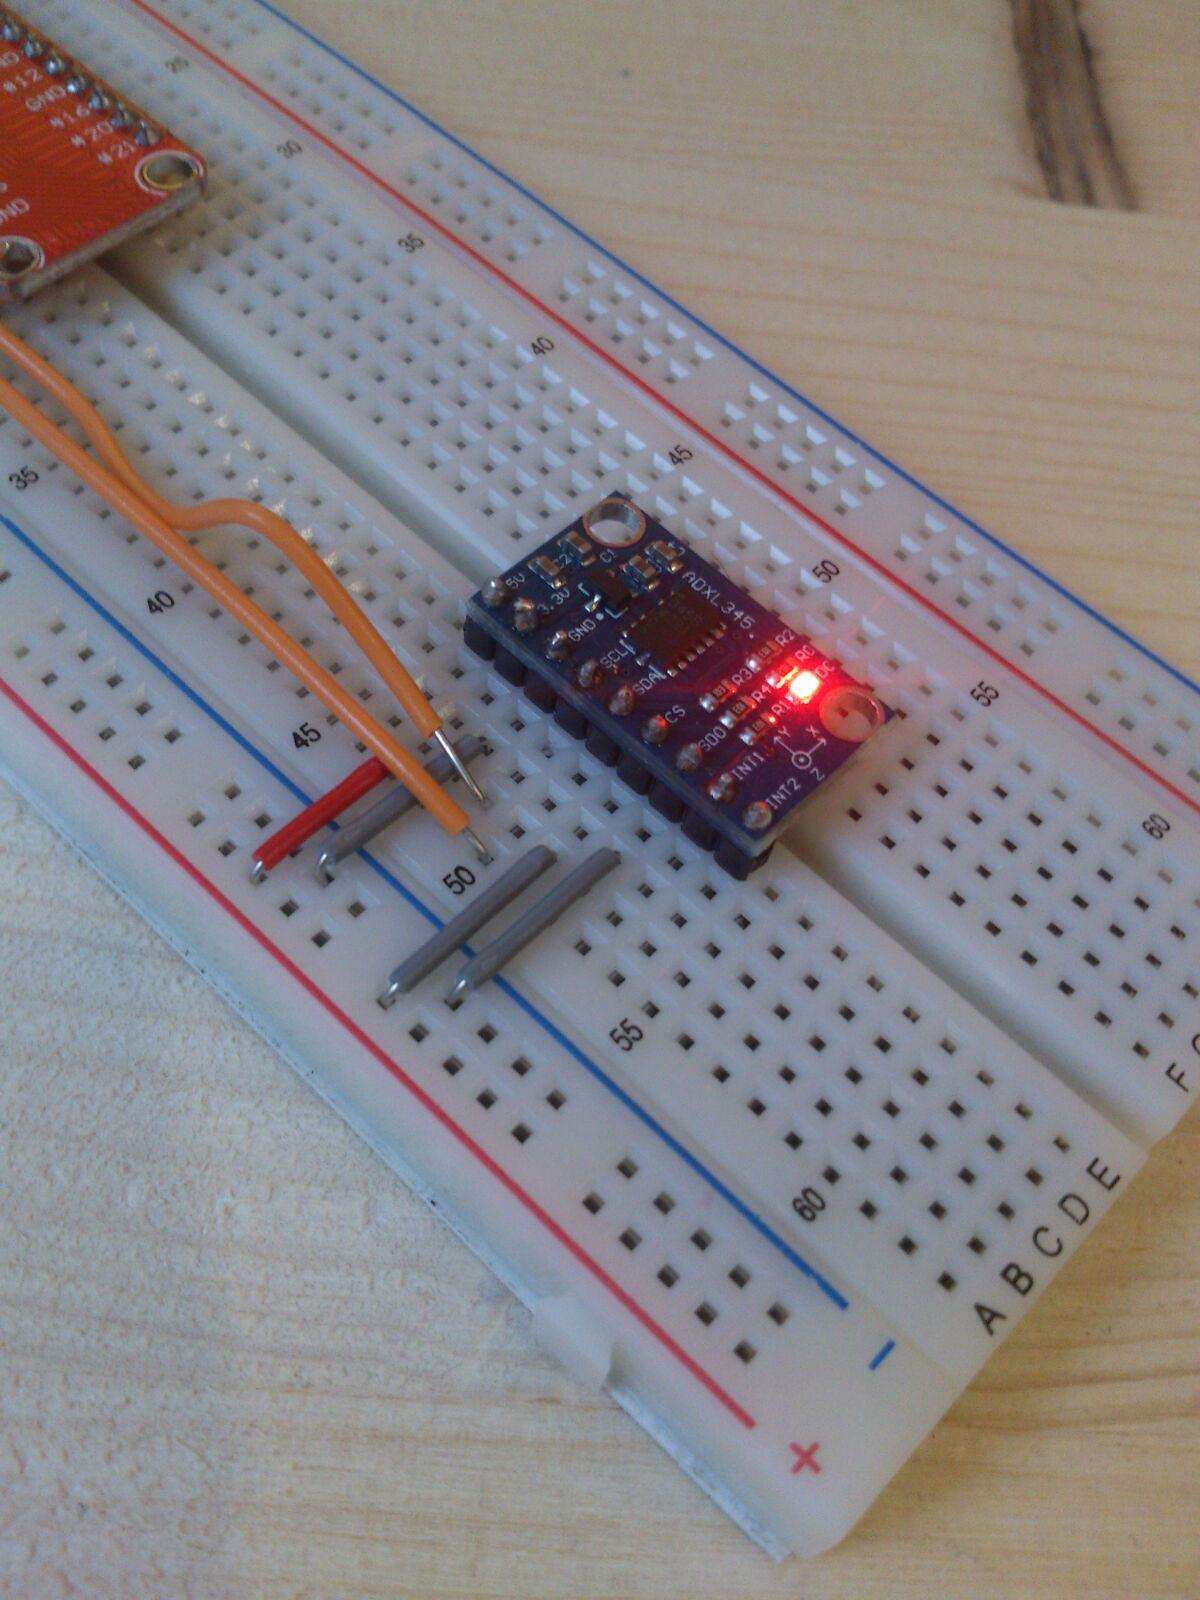
First let’s connect our ADXL345 accelerometer to the Raspberry by connecting the jumpers as follow:
| Raspberry GPIO pin | ADXL345 pin |
|---|---|
| GND | GND |
| 3V | 3V |
| SDA | SDA |
| SCL | SCL |
This will lead to something like:
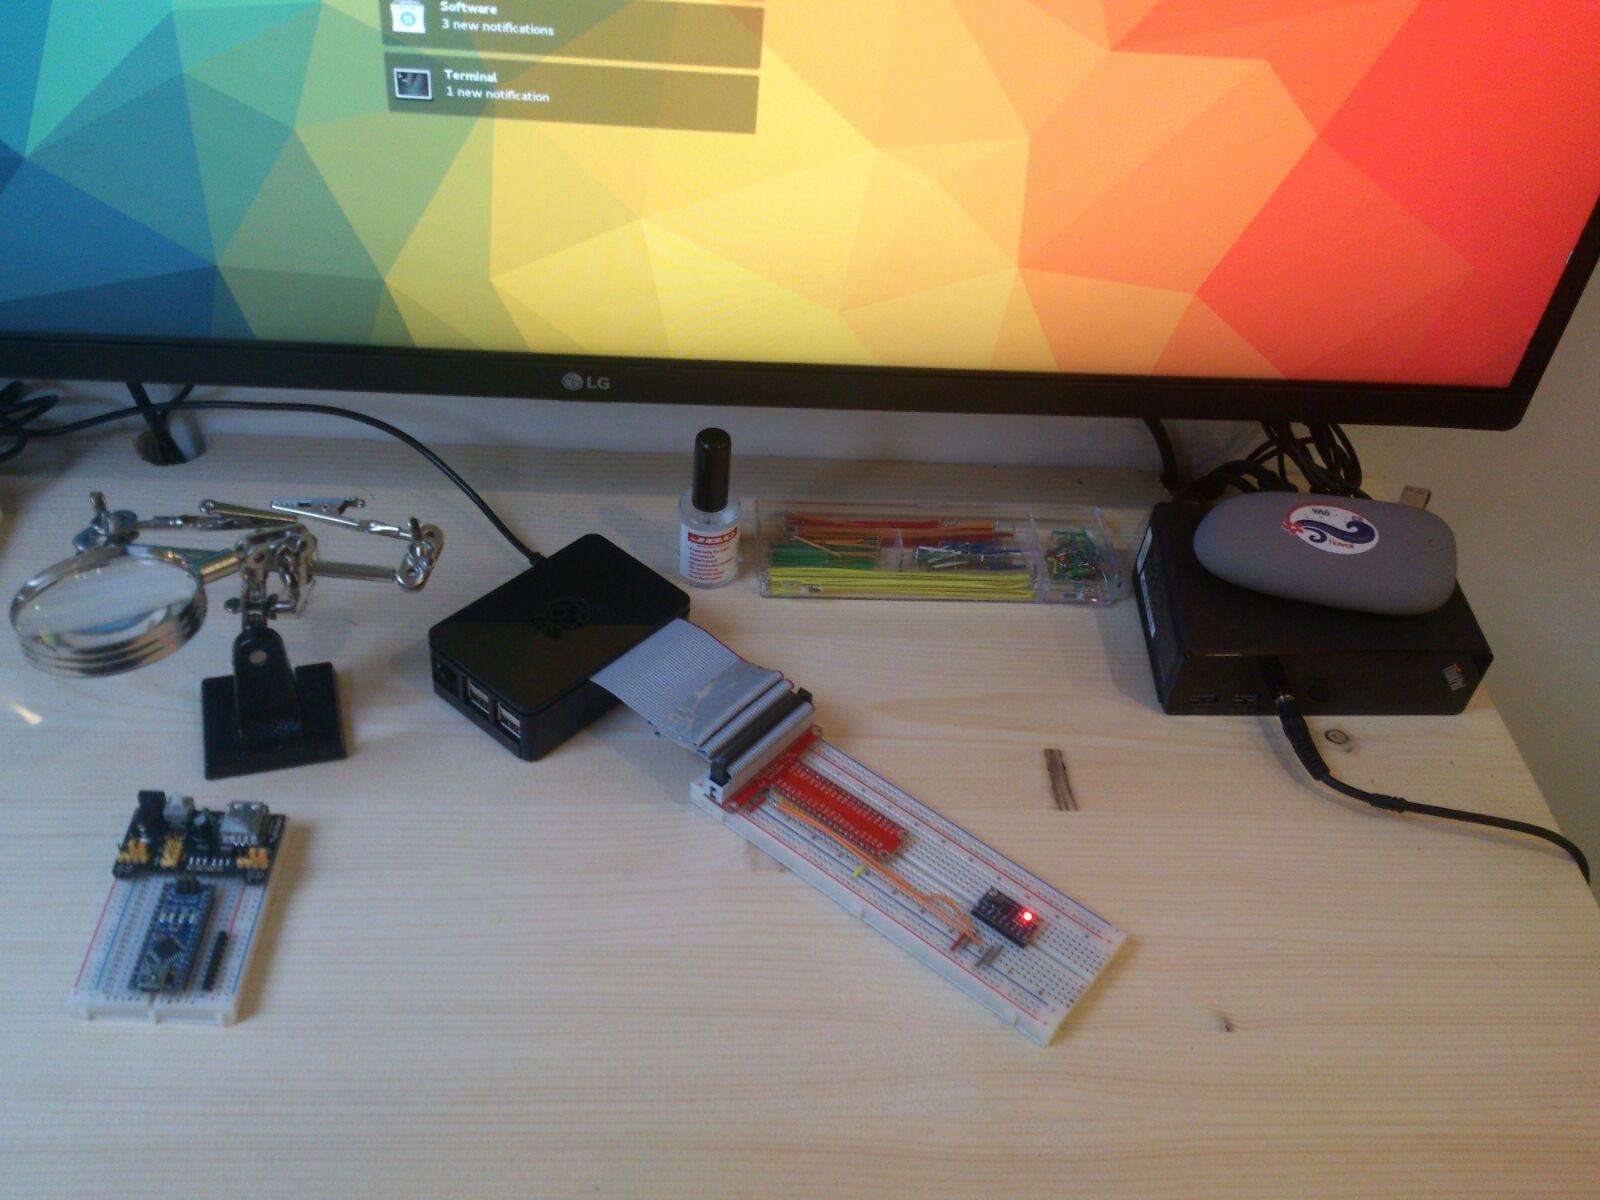
Or a wider view:
Once having the Raspberry wired, let’s configure it by the following steps.
- From our Raspberry Pi, install:
sudo apt-get install python-smbus i2c-tools
- Enable the I2C kernel module in the Raspberry Pi:
sudo raspi-config
Now, enable I2C kernel module in: Advanced Options -> I2C -> Would you like the ARM module.. -> Would you like it enabled by default..
- Edit the modules file (sudo vim /etc/modules) and make sure it contains the following lines:
i2c-bcm2708
i2c-dev
- Remove I2C from the blacklist file (/etc/modprobe.d/raspi-blacklist.conf) commenting the following line if it appears:
#blacklist i2c-bcm2708
- After all these previous steps, reboot the Raspberry Pi
sudo reboot
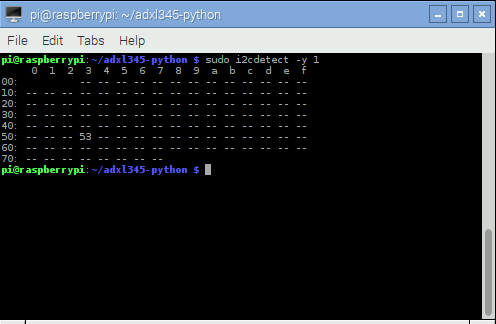
- Test the connection to the I2C module:
sudo i2cdetect -y 1
The command should print the following output:
Now, when having the module working properly, we need to get and use the python ADXL345 library to have access to the time based data.
- Clone the library repository and execute the example code:
git clone https://github.com/pimoroni/adxl345-python
cd adxl345-python
sudo python example.py
The command’s output should be:
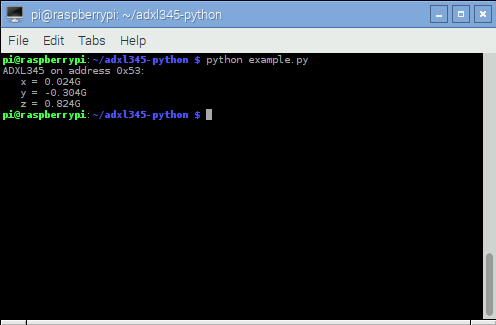
Showing the G forces in each axis.
This is it for the first part of the tutorial. Next posts will dig into the real-time data processing.
Responses
Want to leave a comment? Visit this post's issue page on GitHub (you'll need a GitHub account. What? Like you already don't have one?!).