The Kubernetes in a box project
- Posted on May 21, 2019
- cloud, openstack, openshift, kubernetes
- By Carlos Camacho
Implementing cloud computing solutions that runs in hybrid environments might be the final solution when comes to finding the best benefits/cost ratio.
This post will be the main thread to build and describe the KIAB/Kubebox project (www.kubebox.org and/or www.kiab.org).
Spoiler alert!
The name
First thing first, the name.. I have in my mind two names having the same meaning. The first one is KIAB (Kubernetes In A Box) this name came to my mind as the Kiai sound from karatekas (practitioners of karate). The second one is more traditional, “Kubebox”. I have no preference but it would be awesome if you help me to decide the official name for this project.
Add a comment and contribute to select the project name!
Introduction
This project is about to integrate together already market available devices to run cloud software as an appliance.
The proof-of-concept delivered in this series of posts will allow people to put a well-known set of hardware devices into a single chassis for either create their own cloud appliances, research and development, continuous integration, testing, home labs, staging or production-ready environments or simply just for fun.
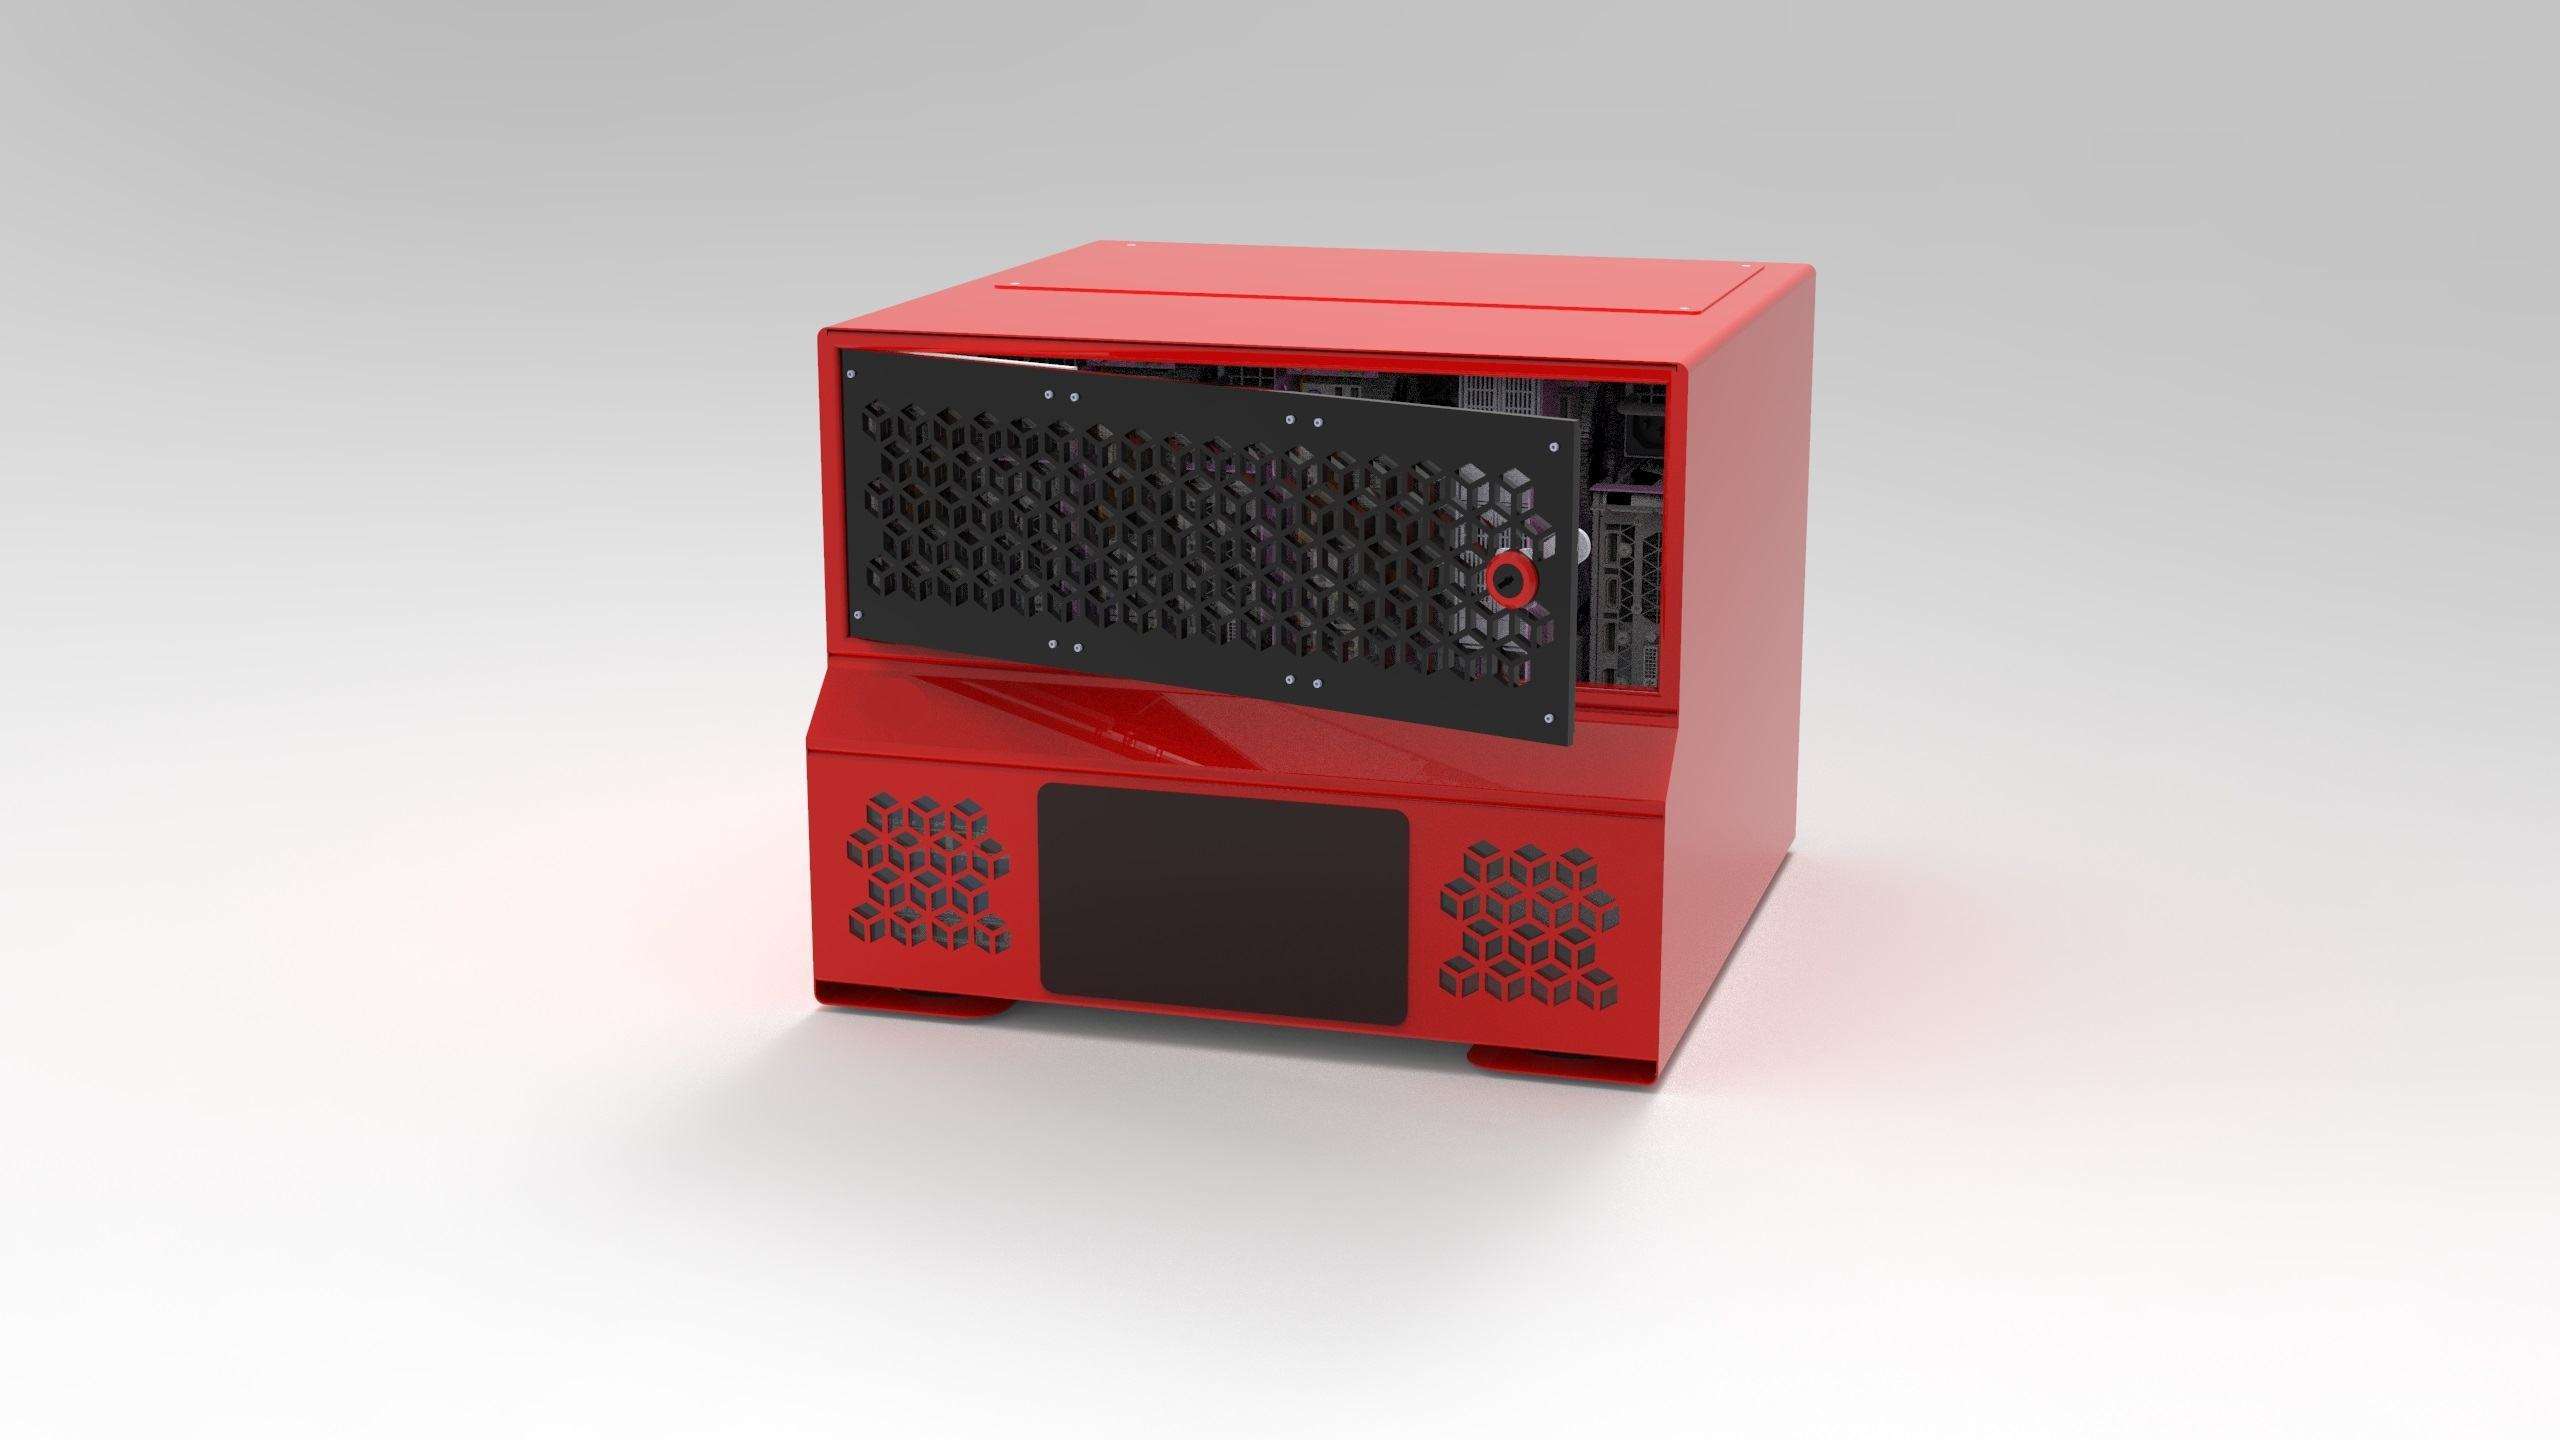
Hereby it’s humbly presented to you the design of KubeBox/KIAB an open chassis specification for building cloud appliances.
The case enclosure is fully designed, and hopefully in the last phases for building the first set of enclosures, now, the posts will appear in the mean time I have some free cycles for writing the overall description.
Use cases
Several use cases can be defined to run on a KubeBox chassis.
- AWS outpost.
- Development environments.
- EDGE.
- Production Environments for small sites.
- GitLab CI integration.
- Demos for summits and conferences.
- R&D: FPGA usage, deep learning, AI, TensorFlow, among many others.
- Marketing WOW effect.
- Training.
Enclosure design
The enclosure is designed as a rackable unit, using 7U. It tries to minimize the space used to deploy an up to 8-node cluster with redundancy for both power and networking.
Cloud appliance description
This build will be described across several sub-posts linked from this main thread. The posts will be created particularly without any specific order depending on my availability.
- Backstory and initial parts selection.
- Designing the case part 1: Design software.
- A brief introduction to CAD software.
- Designing the case part 2: U’s, brakes, and ghosts.
- Designing the case part 3: Sheet thickness and bend radius.
- Designing the case part 4: Parts Allowance (finish, tolerance, and fit).
- Designing the case part 5: Vent cutouts and frickin’ laser beams!.
- Designing the case part 6: Self-clinching nuts and standoffs.
- Designing the case part 7: The standoffs strike back.
- A brief primer on screws and PEMSERTs.
- Designing the case part 8: Implementing PEMSERTs and screws.
- Designing the case part 9: Bend reliefs and flat patterns.
- Designing the case part 10: Tray caddy, to be used with GPU, Mother boards, disks, any other peripherals you want to add to the enclosure.
- Designing the case part 11: Components rig.
- Designing the case part 12: Power supply.
- Designing the case part 13: Networking.
- Designing the case part 14: 3D printed supports.
- Designing the case part 15: Adding computing power.
- Designing the case part 16: Adding Storage.
- Designing the case part 17: Front display and bastion for automation.
- Manufacturing the case part 1: PEMSERT installation.
- Manufacturing the case part 2: Bending metal.
- Manufacturing the case part 3: Bending metal.
- KubeBox cloud appliance in detail!.
- Manufacturing the case part 0: Getting quotes.
- Manufacturing the case part 1: Getting the cases.
- Software deployments: Reference architecture.
- Design final source files for the enclosure design.
- KubeBox is fully functional.
Update log:
2019/05/21: Initial version.
Responses
Want to leave a comment? Visit this post's issue page on GitHub (you'll need a GitHub account. What? Like you already don't have one?!).